An organized ride up the back of Hogback Mountain to watch the sunset for the Summer Solstice was canceled due to a few snow drifts still blocking that trail. I look at Hogback Mountain from our home's window. It's a fairly long ride around and up the back of it. Turn my head 45 degrees to the right and there stands Hedges Mountain. Only about 40 minutes to the top from my front door. Time to formulate a replacement plan. I watched out the window the day before and noted that the sunshine stopped hitting Hedges at around 9:20PM so knew we had to be up there by then. My buddy, Jesse, would be joining me. Tuesday rolled around and we left 8:15pm and were on top of Hedges relaxing by 9PM.
I turned on the date/time stamp so it's all official like. Ha. Click any of the below images to open a larger view in a new window.
Self portrait in the fading sun.
Still a ways to go...
Canyon Ferry Lake and the Elkhorn Mountains in the background.
Going...
Going...
Gone.
Happy Summer everyone!
Yes, I know that summer technically started at 11:16AM Mountain time on June 21, 2011, but something about the last sunset...actually the first sunset... of Summer makes it official feeling.
I had to run an errand up in Marysville, MT today, so hopped on my wife's WR250R (I had left on mine, but immediately had a flat tire so swapped bikes and away I went). While up there, I took the opportunity to see how far up Ottowa Gulch the road was open. Only a bit further than where a buddy had gotten a few days ago. They are doing a lot of work on the roads, as they do every year, with backhoes and big trucks hauling out fill, fixing culverts and basically getting started on the annual maintenance of all the mountain roads and trails. I didn't make it too far, but far enough for some pics.
Still lots of snow up there. If you didn't know they were there, one wouldn't have been able to pick out where the other trails, that branch off of Ottowa Gulch, were located. Deep snow.
Cornices up on one of the ridges.
Since it was so warm today, even up there, the ditches were streams of muddy runoff.
They were doing a great job of ensuring the water flowed into, and remained in, the ditches rather than running down the roads and washing them out. There is still a lot of snow melt run-off in the future, so always good to see them up there shaping things to handle it.
It did turn out to be a perfect Saturday ride. ADVrider's 'Turnenem' and I planned on a 9AM meetup, but after listening to the rain downpour from 5AM - 7AM, I figured we'd have to bag it. An hour later, the sky opened up and the birds began to sing (as they say in the movies). More importantly, the radar indicated the rain was over.
We met up at 9AM on Grizzly Gulch and headed southbound. The roads were perfect; tacky and no dust. Followed Grizzly Gulch to Lump Gulch to Corral Gulch. The observant will, by now, have realized we have no shortage of Gulches around here...and that's the way we like it.
We hit the snowline right by the Park Lake turnoff. Many of the high mountain trails won't be be snow-free until June or later. We then headed back East on Lump Gulch Rd. to Sheep Mountain and played on the trails there for a bit. Again, trails were perfect due to the rain and now drying out, but still tacky. Sun was shining, a great morning ride, and home by noon.
The mighty minis did their thing. More fun per cubic centimeter than you can throw a stick at. The steeds for the day: DR200 and WR250R.
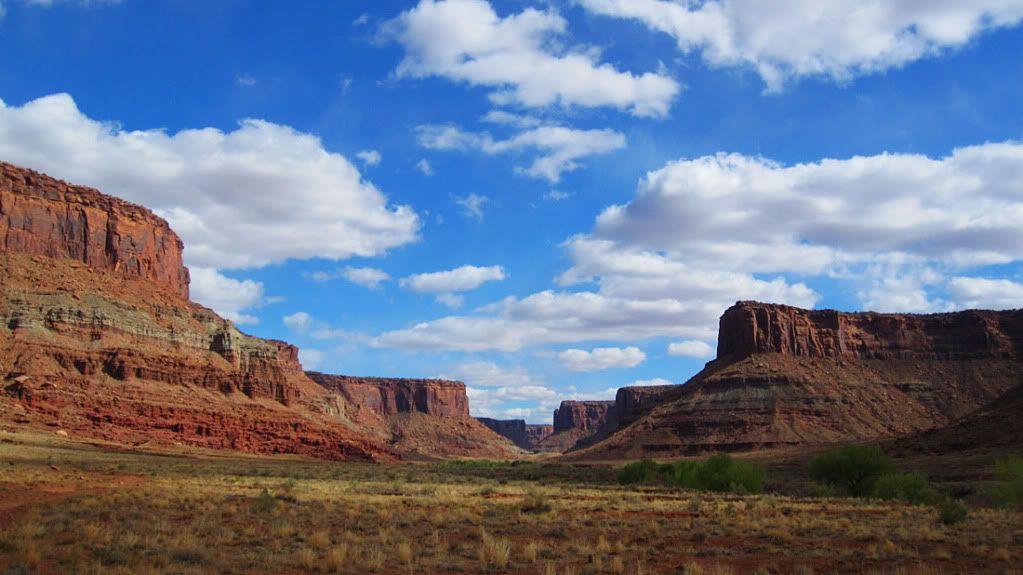
Several buddies and I headed to Moab, UT. We left April 8, 2011 at 6:30PM and arrived in Moab at 6:30AM, got a quick bite to eat, then hit the trails! The first day we road until mid-afternoon. The next two days we road 10 - 12 hours a day. What a great time! This was my first trip to Moab and several of us are already looking forward to another trip on our dual sports.
This won't be a full ride report, but just a quick taste of the trip. I may do a more detailed report later. I am still working on a compilation video, but I have loaded some raw videos into youtube. They are further down this post, but one can always check out my youtube channel directly at: http://www.youtube.com/user/MrChadx1
JJM and John looking West at the inbound rain and snow as we did El Diablo trail. We didn't get rained on too bad largely because it came down as more of a sleet and then snow. Talk about a smile on your face...riding through Moab, UT in the snow.
Uranium Arch off of the Determination Towers loop.
John and Clint up top.
Last day. Second trail of the day. We road Kane Canyon Creek which had a lot of creek crossings (and one winching episode when a creek crossing ended short in a deep spot).
It was a great time and is highly recommended on bikes or ATVs. Next time, I would like to do it on bikes (but I would do an ATV-only trip, too, if the opportunity came up).
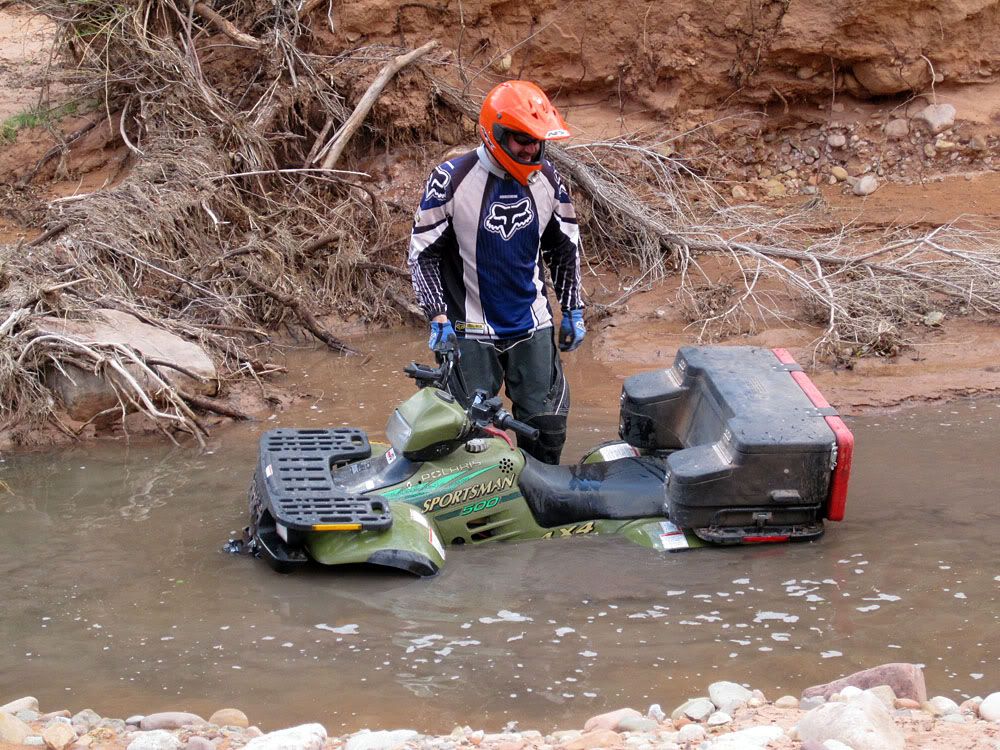
JJM fell into this mucky hole. Most of the creek bottom was fairly shallow and rocky and sandy, but this hole was a low spot and decomposed leaves, etc. had made a nice mucky blackwater bottom. The creek had tricked us.
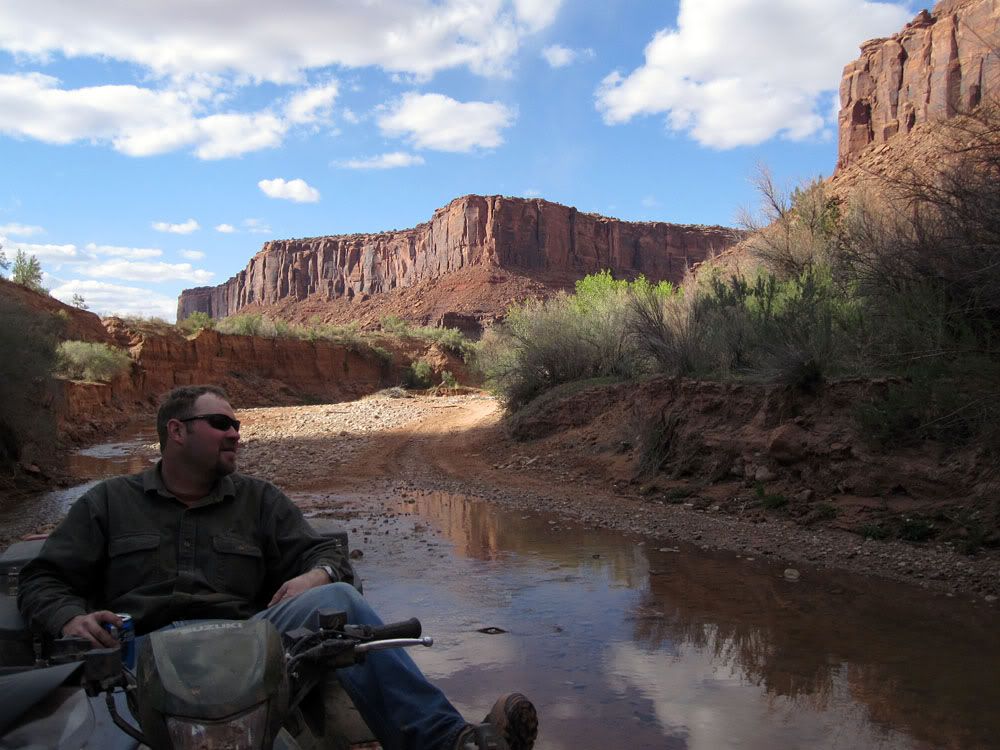
There were usually two or three possible routes as we followed Kane Creek. One on either side of the bank and one right up the creek. The trail jumped back and forth across the creek if you followed the main one and we probably crossed it about 20 or more times.
This was a fun section because we'd often split onto different trails. On the way out, we were scooting along pretty good and passed through this section right around sunset. I looked up a couple times to see someone pass me on the bank trail as I was in the creek trail. Then, around the next bend, the trails would criss-cross the creek and the other person would be in the creek or on the other bank. Fun section.
Even though it wasn't too hot out, it was nice to find a shady spot for a break. The sun was pretty intense and by this, the last, day, didn't feel the best on sunburned/windburned cheeks and necks.
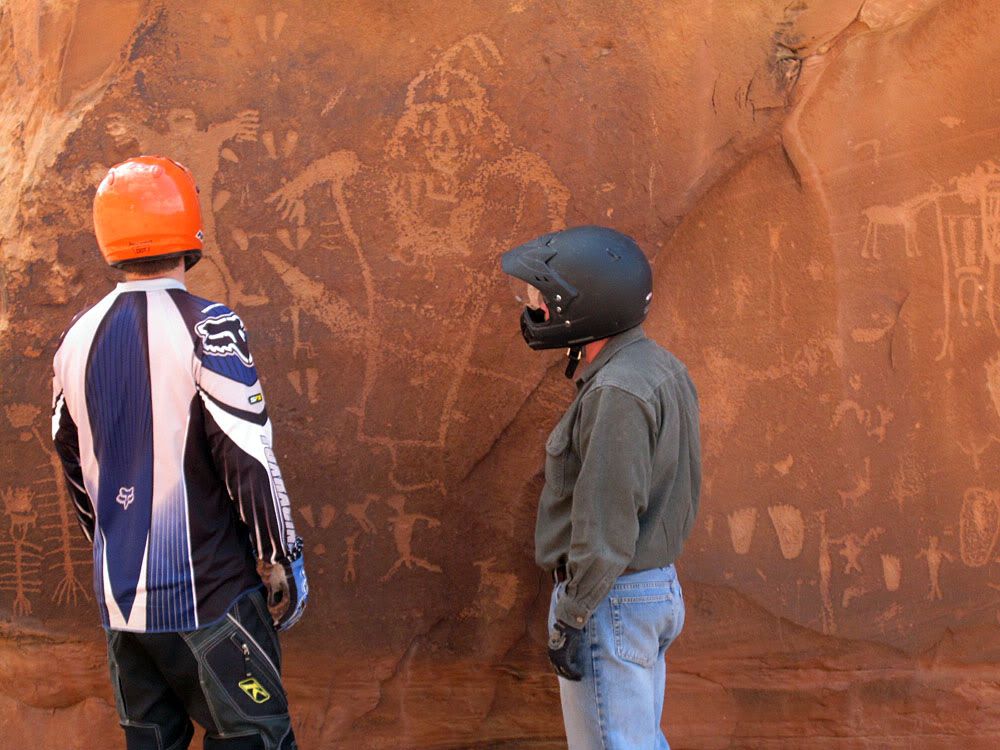
Some petroglyphs on a rock on the way to Kane Creek. I zipped right by these, but luckily everyone else saw them and stopped. We didn't see any Pictographs. Definition: Petroglyphs = scratches. Pictographs = painted.
JJM then John crawling up an approach as Clint watches. It was fun to watch some bikes and jeeps do these sections, too:
Me crawling down with Clint and JJM spotting. There is a lot of traction on these rock faces and it's steep. There were a lot of sections that I would never do without spotters that can pull down a corner if you start tipping:
Watching a bike, from another group, on the same section. Note that he should be standing up on the pegs with his weight forward. Being non-aggressive only gets you in trouble on these steeps.
Me going up. I didn't winch, but JJM had a hold of my winch cable to yank the front end down if I started to go over backwards. Nice to have friends! Clint had just winched himself up the 6 foot wall directly behind me. Pics and vid of that to come.
Winters almost over...well except the 3" we just got in the last 2 hours. Cold and snow has never stopped me in the past, though. Here are a few images looking back on past rides that ended (and some started) with snow.
As always, click any of the following images to open a larger version in a new window.
October, 2009. Turned back by snow on Rimini Rd. west of Helena.
February, 2010. I waited until it warmed up to 16 degrees. Yes, heated gear is a wonderful thing as is a bike that can run it. Headed west of Helena on Lincoln road and was turned back on the Gravelly Range Rd.
Little Prickly Pear Rd. was in much better shape and the day's ride ended up being great. It was way above 20 degrees by the time I got home. Something like 22.
March, 2010. Snow is melting. I went through Nelson, MT (The Cribbage Capital of the World!) and then east on Beaver Creek Rd heading for Hogback before getting turned back by snow.
April, 2010. One month after the above images. Decided we needed 4 wheels at our attempt at getting up Hogback. Snowfall and high winds earlier that day had the drifts piled high. We, once again, didn't make it to Hogback...but it sure was fun trying.
My buddy and I (me on the left) before we hit the snowline.
Here is where we had to turn back. I walked to the top of the ridge and looked West towards Hogback. The wind was still blowing hard and we could see 100' high walls of blowing snow cresting some of the ridges and blowing across open areas.
At one point, I realized J. was no longer behind me. I turned around and headed back only to find him patiently waiting for my return. He got to horsing around and paffed into the ditch. I had to take a pic before winching him out.
June, 2010. Still enough snow out there to turn one back on some mountain trails. This creek was only about 12 or 15 feet across, but I couldn't tell how deep until I gauged it with a stick. Only 2 feet deep but cold. I removed, from my pockets, anything that I didn't want to get wet and put them in the dry saddlebags in case I took a swim. In the winter, I always have an extra pair of gloves and warm jacket with in the saddlebags.
Here was the first long push. You can see my bike at the top of the hill.
After several more of those, I came to this snowpatch. Too steep. Too deep. Too tired. I turned around here knowing that I would just continue to hit snow patches. They were about a foot deep, but crusty so it took everything I had to push the bike up the hill with it in first gear and spinning.
Fun looking back through those images and seeing this bike's accessories evolve (hand guards, mirrors, tank and saddlebag changes). And since these images, it has changed even more; gas tank, seat, etc.
Well, nothing to do now but wait a day or two for tonight's 3" to melt. "Let it snow!" Wait. I mean "Let it Melt!"
The detail in this video is incredible. Shot with a high speed camera at 1,000 frames per second. Make sure you watch if full screen. http://vimeo.com/20759609
(click images to open a larger version in a new window).
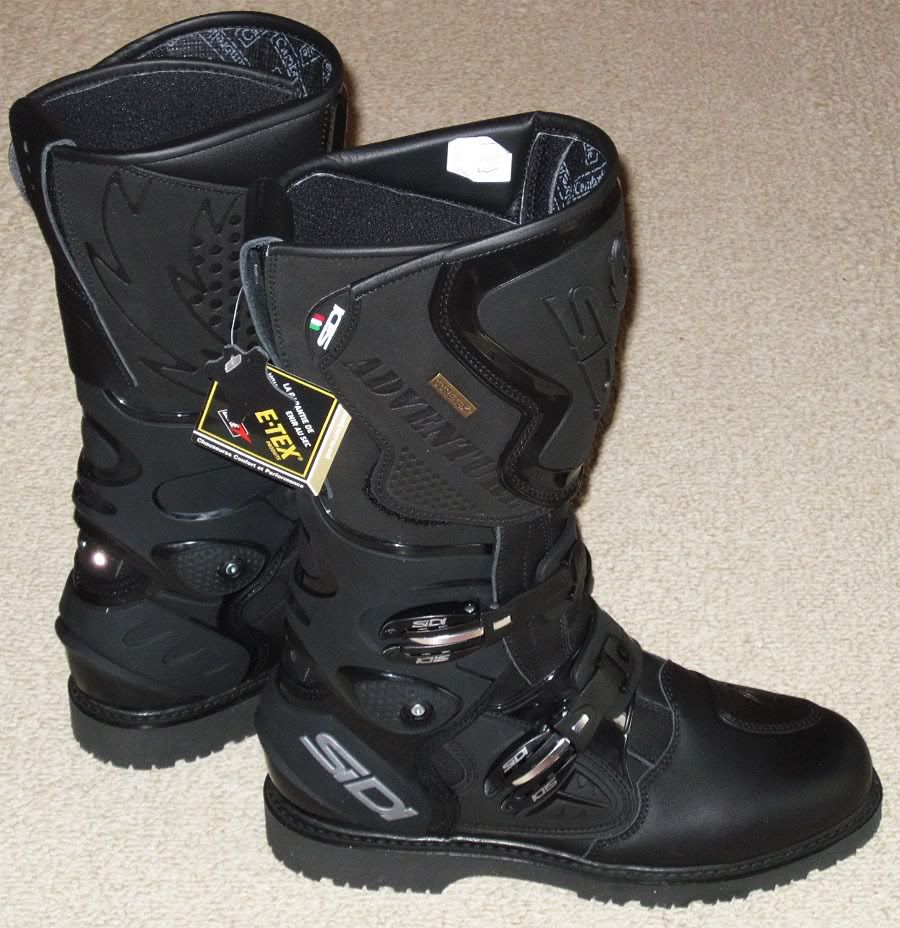
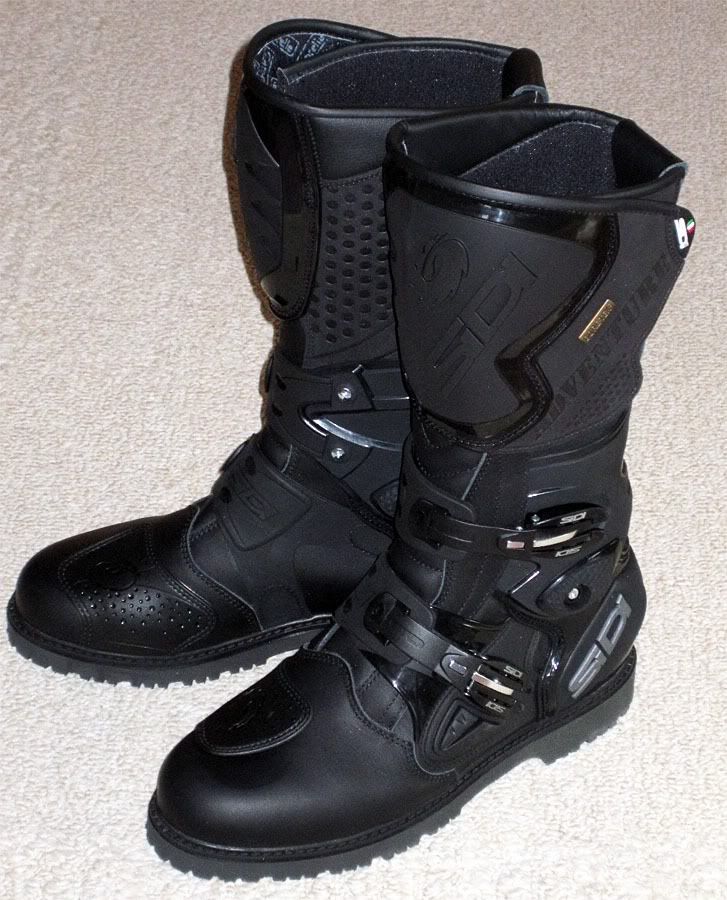
The astute among you will have noticed not only the Gore-tex paper tag, but the metal Gore-Tex badge affixed to each boots' upper. The Sidi Adventure boot was released in a non-Gore-Tex version in the U.S. much to the chagrin of many potential U.S. buyers. Reports have been that the water-resistant U.S. version is holding up good, but I wanted a true waterproof boot. So I unfurled my plan as we made our annual pilgrimage to Germany.
The details of the story: We returned from Germany (October, 2011) where we make a trip about once a year to visit some of my wife's family. I watched anxiously as the U.S. dollar lost value to the Euro over the last three months (The Euro went from $1.25 U.S. to $1.40 U.S. over that time period). That would not only make the boot more expensive for me, but the entire trip. But, was I going to let a little thing like a weak dollar stop me? Well, yes I was. But it all worked out. The exchange rate and MwSt tax (the German VAT tax) refund would play a roll on deciding if the Gore-Tex Adventure was to come home with me or I would settle for the U.S. rain-resistant version.
So I stopped at a motorcycle store chain called Louis there in Munich (informationally, a fellow forum poster looked into it and noted that www.louis.de won't ship to the U.S.). Hoping that the in-store price was the same as their online price of 309 Euro ($432 dollars, at the time), I stopped at a store. They had only two pair on the shelf;size 42 and 44. I needed a 43 since wear a 9.5 U.S. shoe/boot size. Well, they found a size 43 in back and it fit peeeerfect. Very true to size for me. Store prices include the MwSt tax of 19% and various businesses give you a discount up to that % depending on how much you spend. Some previous purchases of lower value had given me only about 10% back. How it works is you pay the full price including MwSt and then get refunded some or all of that (depending on what each business gives you) at the airport with the bill of sale. Then you must check-in the merchandise so they can ensure you are not going to walk back out of the airport with it and hand it to someone; dodging the VAT.
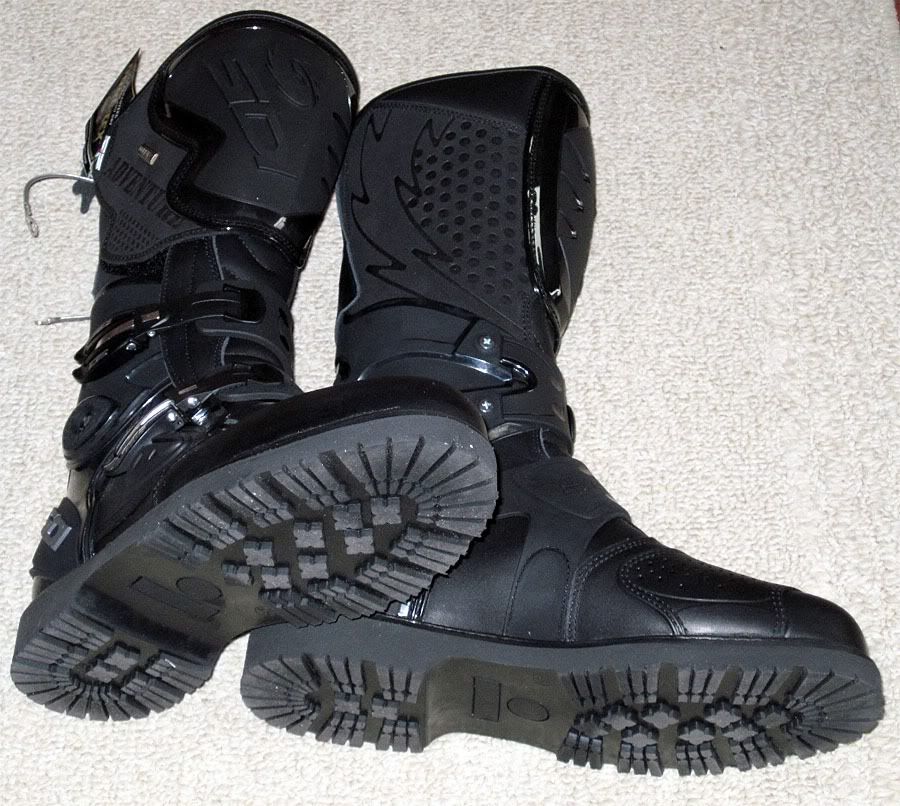
I decided that 309 Euro was fine by me even without the MwSt refund, so I checked out at the store. I ended up with a 42 Euro credit which I got back at the airport. That would bring the price down to 267 Euro or $373 U.S. dollars. With that, I paid $2 less than the asking price, in the U.S., for the U.S. non-Gore-Tex version. Life is good! I took some pictures of them because they will never be this clean again. I'll report back after putting some miles on them, but see no reason that my experiences will be different from others that have posted; comfortable, good protection, water proof...and loudly squeaky at the hinge!
[Update: Since I first authored this in Oct. 2011, the Gore-Tex Sidi Adventure (MSRP:$625) is being imported to the U.S. as well as the water resistant non-Gore-Tex version (MSRP:$375). At $625, my $373 special import still holds as quite the deal even though the Euro was at $1.40 at the time.]
October, 2009 - Went for a quick ride up Hedges Mountain, in the Big Belt range, east of Helena, MT. Sounds impressive, but it's about 10 miles east of my house! Ha. The view looking west towards the Rocky Mountains and down on Canyon Ferry Lake (internationally known ice boating lake).
While slapping new rubber on the back of the minibike this weekend, it was an opportune time to replace the chain slider. I've had a replacement sitting here for a while, but was waiting until I had the rear wheel off for the tire change. It was a quick replacement that you could probably do with the rear wheel still on. You might need to loosen the chain adjusters and slide the wheel/axle forward, though, to give yourself enough slack in the chain, but possibly not. I already had the wheel off, so plenty of slack in my chain as it dangled.
Remove the one bolt that holds on the slider and the two bolts that hold on the sidestand. I also removed the two screws that hold on the sidestand sensor onto the sidestand since I wanted it all out of the way for the remainder of the work.
With 8,600 miles on the bike, it was in need of changing, but still not urgent. As you can see from the chain pic, the telltale buffing was starting to occur on the outside of the chain. That means your chain has trenched in enough that the sides of the chain are in contact with the slider. Time to change it out. I probably should have changed it out around 500 miles ago.
If anyone is curious, of the 8,600 miles, the first 3,000 were with the stock 13/43 sprockets. The next 3,600 were with a 12 tooth on the front and stock rear sprocket and chain. The last 2,000 were with new 13/48 sprockets and a new chain (Primary Drive brand for all).
I didn't measure the depth of the grooves, but it was not getting scary. If you were on a long trip, you could finish it out without worry of chewing anything up. At least with the speed at which it was wearing for me. If you had 2,000 miles on your bike and it looked like this and you had another 2,000 miles to go on your trip? You should change it.
Everyone seems to have different results with the wear rate on these so the best advice is to watch your slider and replace it as needed. When you start to see buff marks on the outside of your chain, time to change, but DO NOT rely on the buff marks alone. Look it over good, especially the lower front part as that is an area where some have seen accelerated wear even when the rest of the slider looks in fairly good shape. The slider is the only thing between Mr. swingarm and Mr. chain. You do not the two of those to ever be introduced to one another, no matter how politely.
In the summer of 2010, I installed a Safari 3.6 gallon gas tank, to replace the 2.0 gallon stock tank, on my WR250R dual sport (not WR250F enduro) and decided to relocate the low fuel sensor on the fuel pump while I was in there. That way, the low fuel light doesn't come on half way through the tank.
Full instructions of the gas tank install are easily found elsewhere, so I won't go into that and will focus on a these few details that aren't as well documented. So here is what I ended up doing while the fuel pump was out. First I zip tied the relief valve baffle in place. This baffle redirects the unused fuel, pumped by the fuel pump, to splash down the fuel pump. This is important to cool the pump since it spends more time not being submerged in fuel, which cools it.
Then I wanted to move the fuel sensor lower as Greer and others have done. Most other folks popped the sensor (silver cylinder with black and yellow wire) out of it's clip then lowered it to a spot right below the clip, as far as the wire would reach.
Here is the sensor popped out of the clip. You can see the clip directly above the sensor.
When deciding on where to relocate the low fuel sensor, I first determined where gas would NOT splash on it and possibly give a false "gas remaining" reading. The relief valve baffle splashes gas on the opposite side, so good there. The Safari secondary pump hose mounts almost all the way down, so little splash risk there. But then I noticed that the clip that holds the sensor is a big plate that is clipped onto the fuel pump. Since it would no longer hold the sensor and it made it more awkward to zip tie everything in place, I removed that bracket.
Here I've removed the bracket and am holding it to the left with a needlenose pliers. Compare with the first image to see where it was originally.
Now with the bracket removed, the upside down T-shaped protrusion (see above) seems like a good place for the top of the sendor to rest against. The bottom fit well along the rim of the ridge below.
Here, due to picture overexposure and loss of detail in the white pump plastic, it is hard to see what the sensor is resting against, but you can see the location and compare to the above picture. In this shot, I've not yet tightened the zip tie. I ended up using two zip ties, one of which also secured the secondary pumps tube on the other side of the pump. A third zip tie secured the bottom of the secondary pump tube.
As mentioned in a previous post, I rode until the fuel light came on and then filled at a gas station around 4 miles later and fit 2.701 gallons (note that this was filling it up the bottom of the neck with the bike on it's sidestand but me pushing the bike so it stood a bit more upright. This was not with the bike standing upright and/or filling up into the neck of the fill neck. If I do that, I fit in closer to 2.8 gallons). So now the low fuel sensor comes on after using 2.8 gallons rather than 1.5 gallons. After using 2.8 gallons of my 3.6 gallon Safari tank, I have 0.8 gallons of reserve. Coincidentally, this is the point at which the primary fuel pump will no longer pic up fuel on it's own and relies on the secondary vacuum-driven fuel pump to deliver fuel to the primary fuel pump's dish.
On a day-to-day basis, I refill as soon as the low fuel light comes on just to baby the fuel pump and keep the fuel at more depth. When on a long ride or in the mountains, I don't hesitate to run it down to just a few tenths of a gallon. The secondary fuel pump reliably pulls fuel from the gas tank wings until the last drop is gone and the relief valve baffle does a good job of splashing the primary fuel pump with gas to assist in cooling.
I replaced the stock mirrors, on my WR250R, with Doubletake mirrors. Doubletake mirrors [www.doubletakemirror.com/] mount on RAM arms/balls and allow you to adjust the mirrors to a multitude of positions including folding them inboard when riding offroad. I've found folding them in unnecessary, so far, since the mirrors are very robust and there is just enough give that they move rather than break, on a tip-over.
When I received them, installation was simple. I used a 1" RAM ball in each mirror socket (using the stock thread-reverser on the right side). I used the 3" aluminum RAM arm. I'm used to using RAM mounts, so adjusting these just seems natural. Here are some pics sitting in the yard.
There have been some reports of the mirrors moving while riding in rough terrain or at highway speeds, but I've experienced mirror movement in only isolated instances. They generally stay put. One possible reason could be the type of RAM arm used (Aluminum vs. Plastic) or simple variations in manufacturing tolerances.
The few that have experienced mirror creep have said wrapping the ball will a couple layers of electric tape has solved the issue. A trick to keep in mind if one experiences unwanted movement.
Mirrors out:
[The following was written Nov. 10, 2010 which will make sense when the weather is referenced]
I have also been using one of these on my ATV all summer. I now have a total of three mirrors and three 3" RAM arms and then have a total of 5 the RAM ball mounts for mirrors (on both of our dual sport bikes plus one on the left front rack of my ATV). Also have ball mounts and arms for GPS (I'm a big fan of RAM mounts). I easily move the three mirrors around between all three.
For bikes and ATV, I recommend the 3" RAM arms over the 2" arms and make sure you get the aluminum arms and not the cheaper plastic ones. The 3" arms get the mirrors further out so you can see past your arms and shoulders better. If you don't want them to stick out so far, you can position the arm to go straighter up and then just the mirror angle out. With the 2", if they are not long enough, you are out of luck. It's just a matter of having more adjustability/options with the 3".
It's negative 1 degree F. here right now and snowing and blowing, but I guess I can head out to the detached garage to snap a picture of the ATV setup. If you don't hear from me in 15 minutes, send the search and rescue dogs...
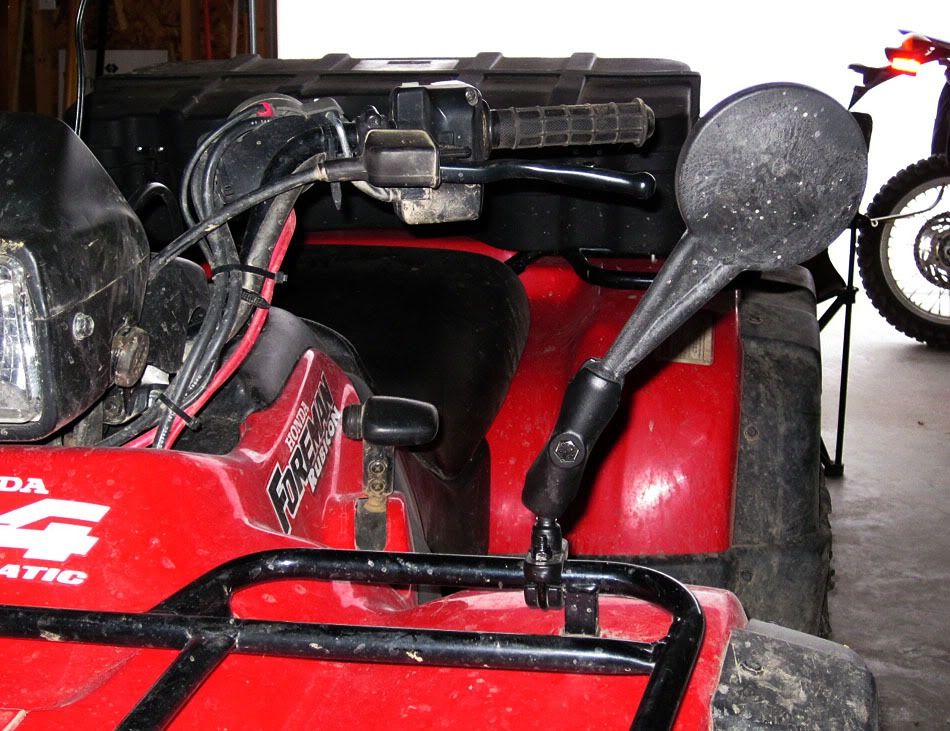
OK, I survived. I didn't back the ATV out (see prior comment on current weather), but here are a couple shots so you can see the Doubletake Mirror mounted on the front rack. This works great and, on the ATV, I like it better than the bar mounted mirror. Plus, with the winch controls, etc. bar real estate was at a premium. I was surprised to find out I preferred the mirror on the front rack. It's give a great perspective, though not as wide of a view as if one were looking at the reflection from a closer position.
In late 2009, I started looking for a handguard solution for my WR250R dual purpose. Wanting hand guards that attached to a top clamp rather than running back to the bars left me two options; Fastway F.I.T System and Highway Dirbike (HDB) system.
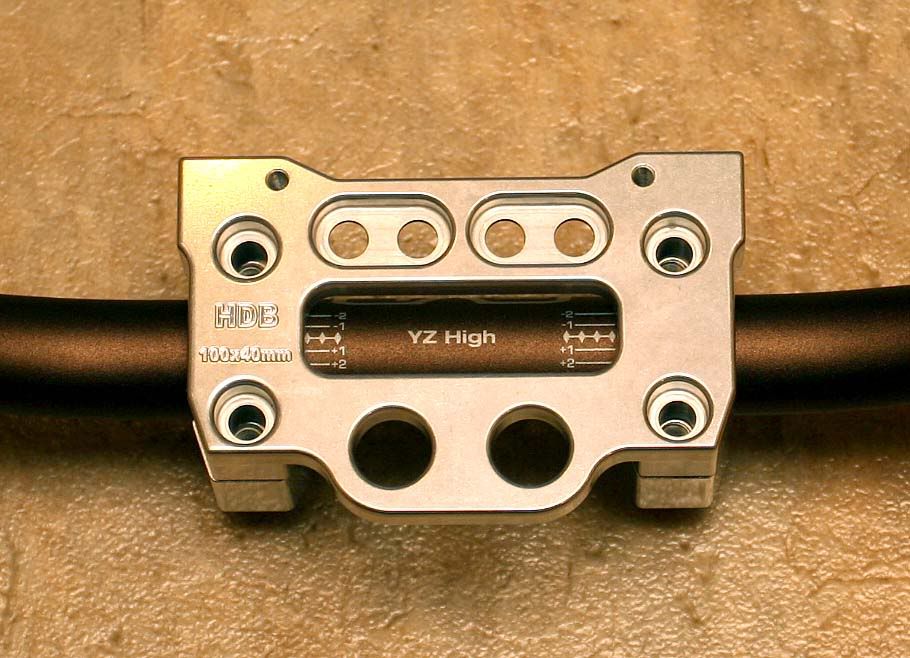
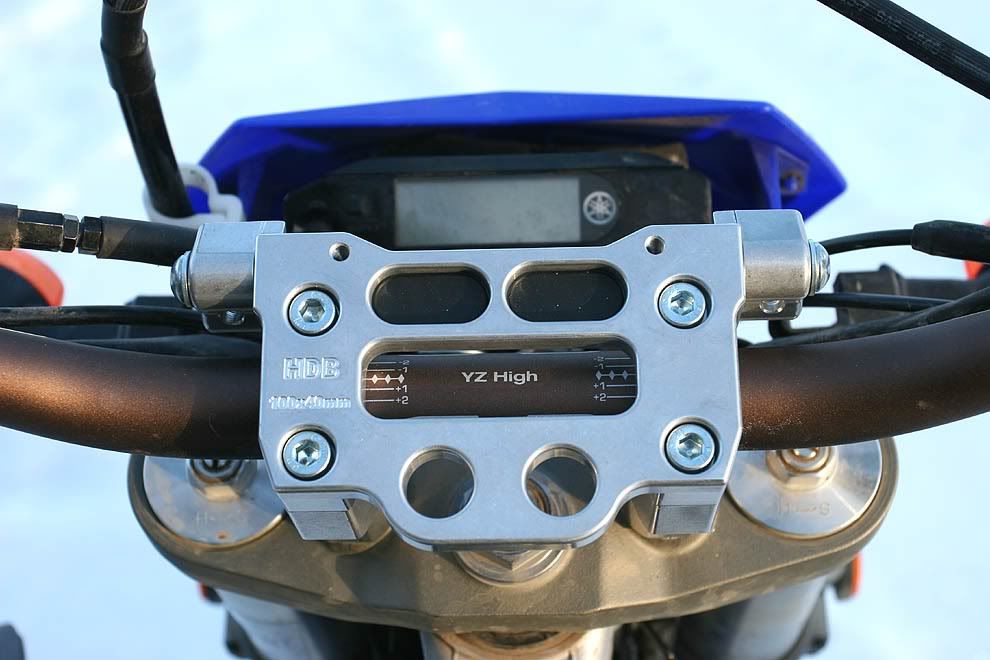
I wanted a place to mount two powerlet outlets, and not wanting to add extraneous brackets, I began investigating integrating the powerlet outlets into the handlebar top clamp. The original version of the HDB top clamp (seen below) had 4 small switch holes in the upper portion. I was curious if the billet aluminum could be drilled out to accommodate the 18mm holes needed to mount powerlets so I contacted Paul, at Highway Dirt Bikes, in September, 2009 to get the ball rolling.
The original top HDB top clamp:
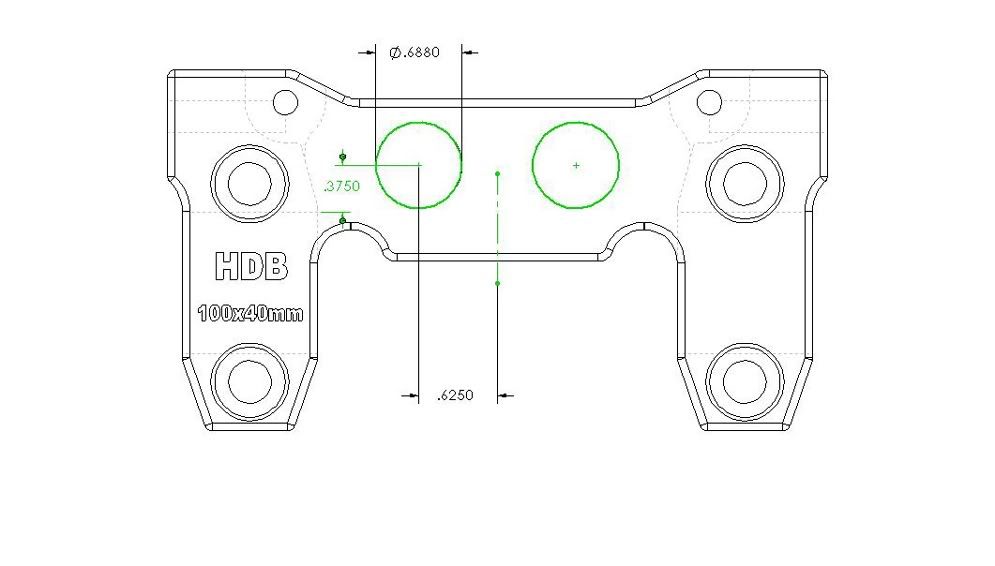
After a bit of discussion on clearances and research on the various powerlet outlets available, Paul worked up the following, replacing the four small switch holes with two 18mm holes.
The design looked great to me. I placed my order for the new top clamp, lower clamps more rise that stock, hand guards, Protaper Evo bars (which he tapped for me), and some of the HDB flip-out mirrors. Then I received an email from Paul with a new idea he had worked up and, suddenly, all was right with the world.
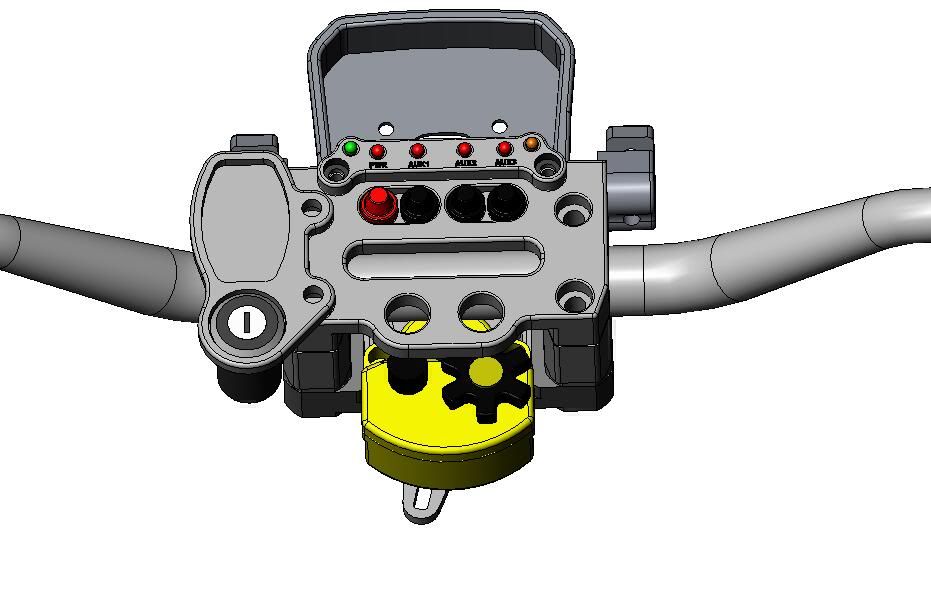
In the below image of the new design, you can see he left the top portion of the top clamp as it was in the original design but added material to create a lower portion in which the two 18mm powerlet holes could be drilled:
Paul ordered the needed material to do a run of clamps. Since I was moving to fat bars, I needed a 100mm x 40mm bolt pattern.
After a couple weeks, the first run was complete and I was pleased to receive this image of the new top clamp design with a low-profile powerlet outlet mounted.
Shortly thereafter, my setup arrived. Looks good even on the kitchen floor.
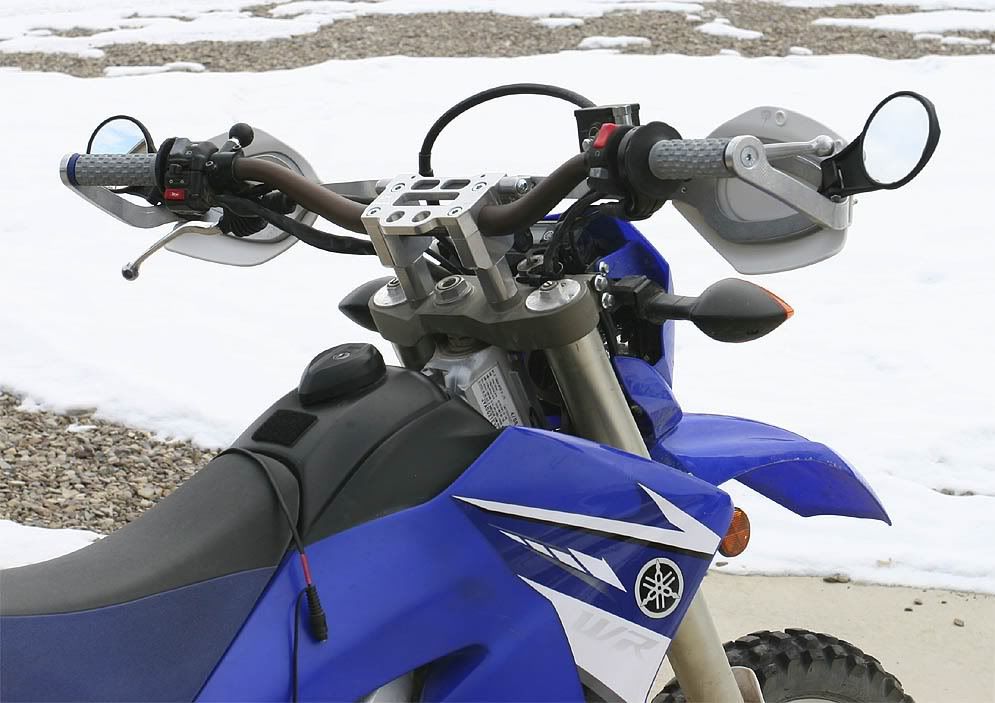
Top clamp being installed. Note the hand guards are not yet installed in this picture, but the two handguard brackets are affixed to the top clamp.This image shows my view from the seated position so the instrument cluster is not blocked by the taller bar setup.
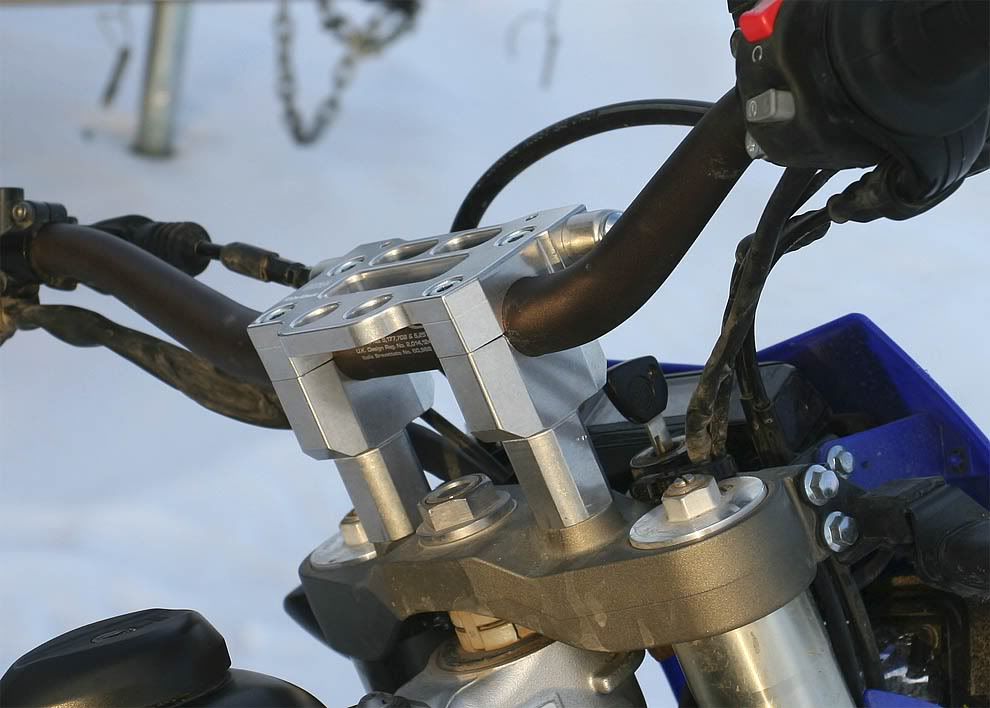
The below image shows the HDB custom lower clamps. These risers are about 2" taller than stock. I chose a bar bend that was 1/2" shorter than stock netting me 1.5" of rise over the stock height. It really has opened up the cockpit. I will have plenty of room to use the standard powerlets, if I want, rather than the lower profile powerlets. I wanted to get my rise from the bar clamps rather than from handlebar bend so this worked out great.
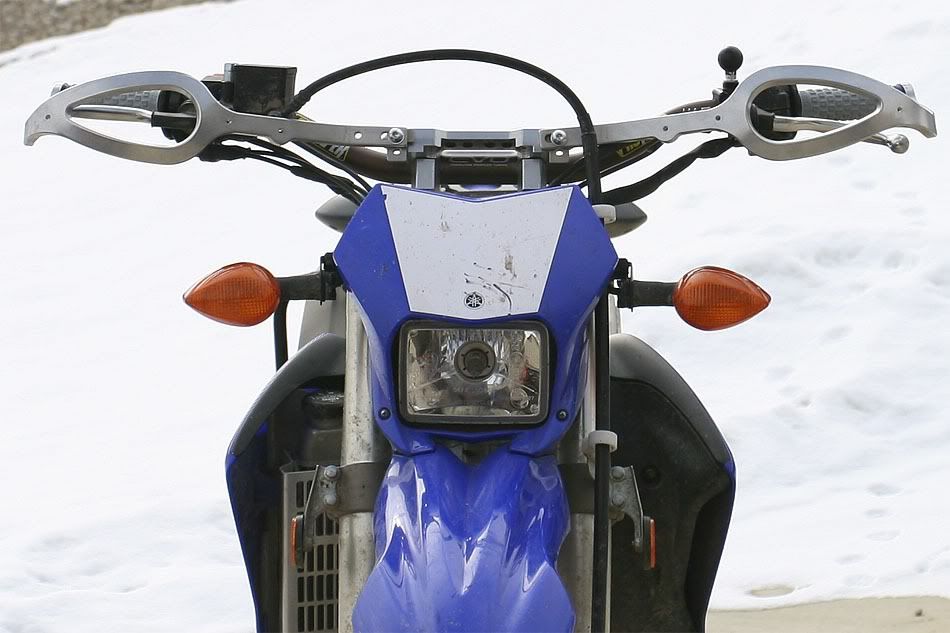
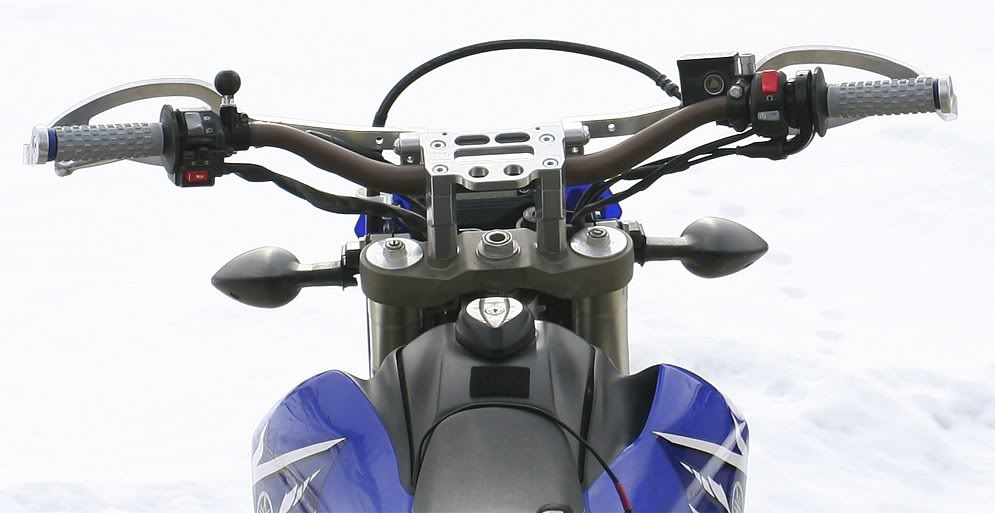
The mostly finished handguard install. Here is a shot before putting on the mirrors and shields.
As mentioned earlier, I used custom HDB lower clamps with about 2" of rise over my stock clamps. The bar bend is 1/2" lower than stock netting me 1.5" of rise over stock.
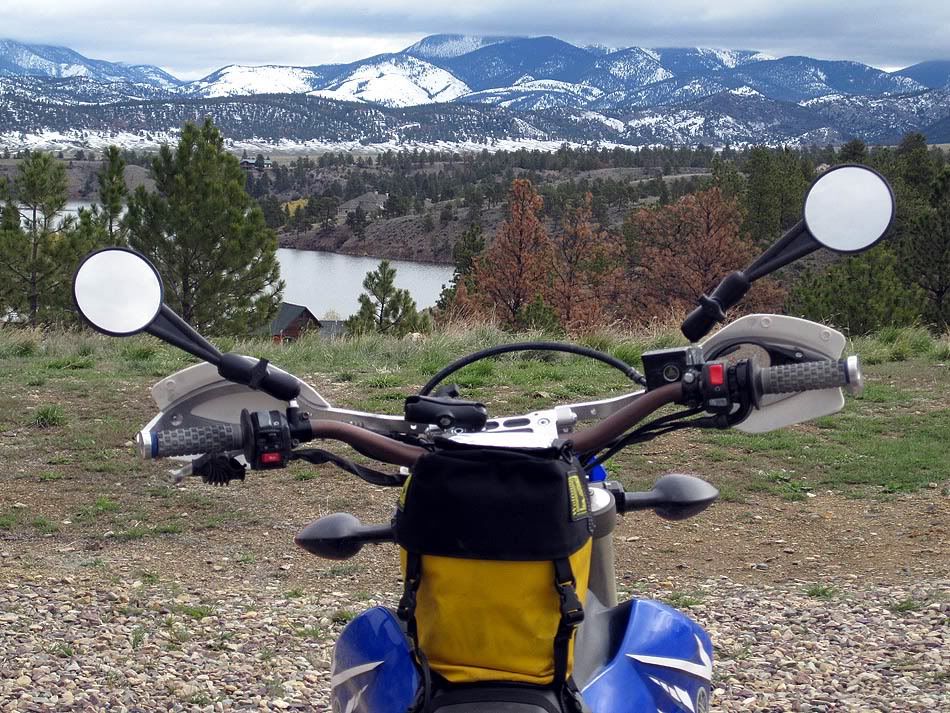
The shields and mirrors are installed. In this image, I've changed the handguard orientation compared to the first two photos. They are angled lower here to improve the view from the mirrors yet still give me the needed protection from wind and branches. I'll adjust them to their final position once I get a few rides in. Note the clutch is out of final position in this image, as are some of the other controls. I was still tweaking positioning of everything.
[Update: I've been using and abusing the Highway Dirtbike handguard and top clamp system for two riding seasons and am quite happy. Having the powerlet outlets in the top clamp is handy and the handguards themselves are much stronger than any other handguards I've used in the past. They hold there shape in crashes unlike thinner bars that need to be bent back into shape with every impact.